About

use code: KGRA2530
Shop toys, games, books, video games, music and more!
Buy Toys at YoYo.com
New customers to Yoyo.com, Bookworm.com or other Quidsi sites only. $20 maximum discount. Subject to change or cancellation.

December 31, 2010

Turkey Tomatillo Tamales

Again, pictures from my phone. I'll never ever do it again, I promise...


Tamales! I've always wanted to make them and when Heavy Table posted this recipe last year, I knew that someday I'd have to do this myself...I've eaten La Loma's tamales and they're wonderful so it's been bookmarked forever and I finally made them yesterday with the leftover turkey from this post.


To be fair, this recipe is unusually vague and so I had to consult my Rick Bayliss cookbook, Mexico One Plate At A Time, for some pointers. If you don't own it, check it out. Every recipe I've tried from here has been a hit!


Also, the recipe says it makes 30 tamales and it made about 50 for us and I'm pretty sure we overfilled them since a few were leaking out the top...


The nice thing about tamales is that they're actually really easy to make and pretty adaptable. Every family, I'm told, has a different recipe and everyone thinks theirs is the best so have fun, experiment and make your own.


Also, get a friend to help you because the assembly is a lot more fun when you have a friend. Shellville, my trusty cooking cohort and author of The Road to Shellville helped me. I love her for it! (and many other reasons, of course...)


One other thing - if you like sauce on the side or on top afterwards, DOUBLE THE SAUCE RECIPE! I really wish I would've because I could have had some on the side or saved for enchiladas...


Turkey Tomatillo Tamales
Yield: 50 tamales
Approximately 3 lbs of  turkey left over from this recipe, shredded
(You can also just cook your own chicken or even use a rotisserie...)


2 ½ lbs tomatillos, skin removed and quartered
8 jalapeno peppers, stems removed, cut into chunks
1 medium white onion
4 cloves garlic
Chicken bouillon to taste - (This instruction left me wondering if they meant just the boullion cube or in liquid form or what...I chose to throw in a cube and then added enough water so that my total sauce was 40 oz.)
Instructions:
Boil the tomatillos, jalapeno peppers, onion, and garlic in water until cooked, about 5 mn. 
Discard the water and process the sauce ingredients in a blender with the chicken bouillon.

Add 12 oz of the sauce to the shredded chicken; set the remainder aside for use in the following dough preparation.


Tamale Dough
1 ½ lbs dried corn husks for tamales, picked clean of stringy fibers
4- 5 cups chicken broth, to reach desired consistency
1.5 tsps baking powder
28 oz green sauce (from recipe above)
1 lb lard or crisco (we had crisco although I'm sure lard would make a much better flavor)


Instructions:
1. Soak the corn husks in hot water for 10-20 minutes, wash them and allow them to drain.

2.Mix the masa and baking powder together - add broth, green sauce and lard or crisco until the mixture resembles that of cake batter.

3. Into each tamale wrapper, spread 1/4 cup of the masa dough and on top of that, place 1-2 Tbsp of meat mixture and wrap with the corn husk, folding the bottom up or tying with a strip of wrapper. More detailed instructions can be found here.

4. After all tamales are assembled, place them upright (closed end down) in a 20-qt tamalera(tamale steamer) or a really large pot. I ended up using my Ball Canning Bath with the steamer handles flipped under and the top lined with leftover corn husks. Pour about a cup of water into the pot and Steam for two hours; making sure to check that the water doesn't evaporate. Keep a small pot with simmering water next to the steamer so that you can refill it if needed (I needed to twice).

5. After they're done steaming, let them sit at least 15 minutes and then warm up if you're eating them immediately. Otherwise, they can be refrigerated and re-steamed (or microwaved) within 3 days or frozen and saved for up to 3 months. 

Chile-Rubbed Roast Turkey aka Turkey Heaven!


I'm going to apologize in advance for the shoddy photos - I used my phone thinking it would be the same. It's obviously not.


I discovered this recipe when I was searching for a brine recipe for Thanksgiving and just knew that I had to bookmark it and save it for later. I don't know about you, but although I love holiday food, I really start craving SPICE right after Christmas. Too much starch and ham and sausage and meatballs and....well, you get the picture.


I got a little impulsive around Thanksgiving and bought 3 turkeys! They were such a great price and I had room in my freezer at the time...so I had that going for me. I adapted the recipe only slightly because I had forgotten my list when I got to the store and so bought guajillo peppers instead of the pasilla. They're close enough I guess, or maybe this is even better because I'm absent minded....either way, you should totally make this. It's SO SO good - and although I used all the leftovers to make a mad amount of tamales, (recipe to come), they could also be used to make some killer enchiladas! In fact, I froze the rest of the gravy to use as a base for enchiladas that I'll probably make with chicken next week - I'll let you know how that goes.


p.s. My husband had THIRDS of this - he was pretty leery at first, but everyone loved it, even picky little baby Moo who NEVER eats dinner unless we have pizza...


Chile-Rubbed Roast Turkey


6 guajillo chiles, stemmed and seeded
30 cloves garlic (5 finely chopped) - (yes, this seems like way too much, but it mellows and is lovely, I promise)
1/3 cup orange juice - I used fresh squeezed from about 2 naval oranges
3 tbsp. extra-virgin olive oil
2 tbsp. honey 
1 tbsp. kosher salt, plus more to taste
1 tbsp. whole black peppercorns
1  12 lb. turkey
1 large onion, quartered
1 orange, quartered
1/2 cup red wine
2 tbsp. butter
4 cups turkey or chicken broth - I used low sodium Pacific Natural - it's my favorite to buy when I don't have any of my own in the freezer.
1 1/2 tbsp. cornstarch mixed with 3 tbsp. water
1/2 tsp. freshly grated nutmeg
2 tbsp. finely chopped cilantro


1. In a 10" cast-iron skillet over high heat, toast chiles, turning once, until fragrant, about 30 - 60 seconds per side. Transfer to a small bowl and cover with 1 cup boiling water; let soak until soft, 20 minutes. 


2. Transfer chiles and their liquid to a blender along with 25 cloves garlic, orange juice, oil, honey, 1 tbsp. salt, and peppercorns and purée until smooth, about 2 minutes. Set chile rub aside. 


3. Heat oven to 475° and place rack in bottom third of oven. Season inside of turkey with salt. Stuff the turkey with the oranges and onions and then pour the rub all over the turkey. 


Transfer the turkey breast side up to a roasting pan.  Roast for 30 minutes; lower heat to 325° and cook for 30 minutes more. Remove turkey from oven and, using kitchen towels to protect your hands, flip turkey breast side down. Roast, basting every 45 minutes, until an instant-read thermometer inserted into a thigh but not touching the bone registers 165°, about 3 hours total for a 12 lb turkey - mine was about 10.5 lbs and so only took 2.5 hours. Lower oven to 150°. Transfer turkey, breast side up, to a baking sheet; return to oven to keep warm. Remove turkey from oven 15 minutes before serving.

3. Meanwhile, add wine to roasting pan and heat over high heat. Scrape up any brown bits; cook, stirring, until mixture has reduced by half, about 5 minutes. Set a sieve over a bowl; strain liquid and discard solids. Put liquid into freezer and leave for 30 minutes. Skim and discard fat; set liquid aside. Melt butter in a 12" skillet over medium heat. Add remaining 5 cloves of minced garlic; cook until soft, about 2 minutes. Add broth and reserved liquid; turn up heat to medium high and boil to reduce by half, about 15 minutes. Whisk in cornstarch mixture; bring back to a boil and cook for 2 minutes; strain through a sieve into a 1-qt. saucepan. Stir in nutmeg and cilantro and season gravy with salt and pepper. Carve turkey and serve with the gravy.

December 28, 2010

Cran-Neño Jam!


I put out a feeler on my facebook a week or so ago about what my family would like better for a gift, a salted caramel pear butter or a cranberry jalapeno jam. While most of my friends voted for the butter, the family weighed in with a vote that was almost unanimous towards the jam.

So today I made it! And it's delicious!

A complex layer of flavors that hits your palate when you try it - the heat from the jalapeno, the sweet from the sugar, the tart from the lime and cranberry. Again, something that pairs wonderfully with cream cheese and crackers...seriously, do I can anything that DOESN'T pair well with cream cheese and crackers? Thank you Amy for introducing me...life hasn't been the same since.


This is a really simple, straightforward project and I encourage you to try it. I made 13 pints as well as having another 2 that I just stuck in the fridge for Christmas Day.

Ingredients:
6 cups water
6 cups sugar
3 lb bag of cranberries
6 jalapenos
2 limes, zested and juiced


Instructions:

Chop 1/2 of the cranberries and all of the jalapenos (you can deseed or remove the pith first if you don't want it too spicy) in your food processor. I pulsed mine maybe 12-15 times.


Bring water and sugar to a boil in a large stockpot. Cook until sugar dissolves and then boil hard for 5 minutes. 


Add all the cranberries, jalapenos and the zest of the lime


Bring back to a boil and cook hard for 15 minutes or longer, making sure that the cranberries pop and release their juices.

Take off the heat and stir in the lime juice. Fill pint or jelly jars 1/4" from top, release bubbles, and process for 15 mn. Let sit for a minimum of 24 hours before opening.


p.s. I'm finally publishing this now, after Christmas - a couple notes - I accidentally let this boil over after I had added the fruit and the peppers and all my seeds (a source of most of the heat) rose over or stuck to the sides of the pan. The batch that I stuck in my fridge had most of the seeds and so was really spicy and wonderful, but all the ones that I canned were really tame. However, the flavor was still really good. I served it at two different parties and it was  hit both times, so have fun with it and enjoy! Even mistakes turn out wonderful sometimes...

December 4, 2010

Beer Cheese Soup - Round 2! The American Version...

My sister sent me an email a while ago asking for a good beer cheese soup recipe and I knew I had posted one previously and liked it but don't remember it being amazing or anything...(that one is here).

There was a recipe in the ATK magazine recently that inspired me to try again and so I did. It was good but lacked the beer taste and zip of the other soup, however, this one was MUCH creamier and less gritty which I attribute to a bit o' American.

My sister hates american cheese, but M - if you're reading this - just try it! It doesn't taste like yucky american cheese, you just use 3x more extra sharp cheddar and it balances out perfectly - no gritty oily soup!

I'm just going to plug my lodge dutch oven here for a sec...Lodge EC6D33 Color Enamel Cast-Iron 6-Quart Dutch Oven, Caribbean Blue
It's sort of really awesome and I make so many things in it. Perfect for soup and I can finally make rice perfectly!!! I got it as a present from my husband a couple years ago and it was the best thing he's ever given me. He loves technology and so usually gets me gadgets but that particular year I specifically requested this and he obliged. Mine is blue, like above, because someday when I can afford to remodel my kitchen, it will be filled with blue things. My friend just bought one too and I don't know if she loves it yet, but I think she will :)

AMERICAN! Beer Cheese Soup

Ingredients:
4 Tbsp butter
1 yellow onion, chopped fine - about 1 cup
2 carrots, finely diced
1 large celery stalk, finely diced
2 cloves garlic, minced
1/3 cup flour
2 cups low sodium chicken broth
1 - 12 oz bottle beer (I actually used miller lite this time since it was all we had - I think the lack of beer taste definitely had something to do with it. ATK recommended Miller High Life! which I thought was funny, but my husband reminded me that it's the "champagne of beers", so hey...who am I to judge.)
12 oz sharp cheddar cheese, shredded
4 oz american cheese, frozen for 15 mn and then shredded
2 tsp cornstarch
Salt and Pepper to taste
POPCORN!!! for garnish (Mmmmmmmm)

Directions:
1. Melt the butter in a large Dutch oven over medium heat. Add the onion, carrots and celery and cook until lightly browned, 8 -10 mn. Add the garlic and cook another minute.
2. Stir in the flour and cook until golden, about a minute.
3. Slowly whisk in the broth, beer and milk. Bring to a simmer, then reduce the heat to low and simmer gently (do not boil) until the carrots are very soft, about 20 mn.
4. Meanwhile, toss the cheeses together in a large bowl. Sprinkle with the cornstarch and toss until well combined.
5. Using an immersion blender, puree the soup until completely smooth (safest done off the stove)
6. Return soup to the stove and simmer over medium low heat.
7. Whisk in the cheese a handful at a time, until smooth.
8. Season with salt and pepper to taste and serve garnished with popcorn (lots of it!)

Enjoy!

December 3, 2010

Crockpot White Beans with Kielbasa and Spinach

I ate Cassoulet once at this cafe in Stockholm and it was so delicious that it's haunted me for years. I don't know what it was...the soft white beans, the sausage (I love sausages!), the spinach that wasn't gross (I didn't care for it much before this)...who knows. At the time, I really didn't know what else was in it. For reference, here's a recipe, including a link to make your own duck confit. Seriously.

When I saw that recipe in my Fine Cooking magazine I thought about it for a second and realized there is NO WAY I could ever make that within our grocery budget and with 4 kids constantly interrupting me. Not going to happen. Cooking is like therapy to me, but there's a fine line between good therapy and overpaying someone to stress you out.

So Cassoulet goes on the back burner along with Classic Beef Wellington and Croquembouche and a few other recipes I have stashed away for when my kids have all grown and moved out of the house.

For this recipe, I just sort of used the inspiration of Cassoulet and did it with what I had on hand and it was delicious. Pair it with a baguette to soak up the juices and it's the perfect dinner for a cold evening. Oh, and I totally made it in the crock pot because I wanted to try making beans in the crock pot, so it was even that much simpler and dried beans make it even cheaper so I had the extra money to buy the GOOD baguette and a bottle of Cabernet to go along with it. Mmmmmm....comfort food at it's best.

Crockpot White Beans with Kielbasa and Spinach


Ingredients:
8 oz dried white cannelini beans, picked through and soaked overnight
1 small yellow onion, diced small
4 cloves garlic, minced
1 Tbsp fresh thyme
1 Tbsp fresh rosemary (I was out this time so used 1 tsp dried)

2-3 cups low-sodium chicken broth (or make your own!), enough to cover beans by 1"
1 large Kielbasa ring or smoked sausage - I think it's about 1 lb, (how do you call this out on a recipe? I have no idea)

8 oz spinach (or, if you buy it in bags, I think they come in 6 oz bags?) - chopped
olive oil - a little for sweating the onion/garlic, a little for a final drizzle

Directions:

  1. Heat olive oil in small pan over medium heat - add onion and cook, 3-4 minutes or until translucent. Add garlic and cook another minute or two. De-glaze pan with a little of the broth and transfer to a crock-pot set on high.
  2. Add white beans, remaining broth, thyme, rosemary and black pepper. Cover and cook on high, 4 hours. (or, if you make this when you go to work, cook on low and then finish with the steps below)
  3. After 4 hours, add the kielbasa - cook another hour to allow flavors to meld and kielbasa to plump up. I cut mine in large chunks because it was too large for my crockpot, but you could also leave it whole or slice up.
  4. Right before serving, add spinach and stir around until it's wilted - it should only take a couple minutes. Drizzle with a Tbsp of high -quality olive oil and serve in bowls with fresh shaved parmesan on top.
Yummy!

November 24, 2010

The BEST mashed potatoes EVER...

I know this is sort of a lame post, especially since I won't have a picture until tomorrow, but hey...a girl has to post what a girl CAN post...

These can be made ahead and reheated in the oven or kept warm in a crock pot. I've mostly made them a day ahead and then warmed them up in a crockpot or baked them in an oven for 45-60 mn.

I promise that these are great - super delicious. I found the recipe 4 years ago and haven't looked back. I'll post a picture tomorrow, (or sometime this wkend). Seriously, make them tomorrow!

RECIPE:
5 lbs potatoes (preferably yukon gold, but russets work well too), peeled and diced
1 8 oz container Top the tater OR 8 oz cream cheese plus 1 tsp garlic powder
1 8 oz package cream cheese
1 package  fresh chives, snipped/chopped into little pieces :)
salt and pepper to taste

Cook potatoes in boiling water until tender
Drain
Add the rest of the stuff and mash! mash! mash!
salt and pepper to taste

EAT!

or...put them in the fridge and re-warm tomorrow. That's what the original recipe was intended for :)

ENJOY!

November 22, 2010

Roasted Cranberry Sauce


Thanksgiving is coming! Thanksgiving is coming!

My favorite holiday of the year...no surprise there, but really, this is my least creative holiday...we just stick with the basics - turkey, potatoes, stuffing, etc. What I really love about this holiday is that it's just about getting together with people you love, sharing a good meal, maybe a glass of wine, and relaxing. No worrying about presents or baskets or anything else, just good old fashioned family time :)

My Mother used to always buy Cranberry sauce from this fancy grocery store around here and they were SO good - I decided this year to try making my own and I am SO glad that I did - they are delicious! ...or as my cranberry making cohort and I would say:  some kind of...AWESOME!

(I'm still working on that label!)

I was skeptical about roasting them, but I think it really makes the dish. It just adds a depth to them that you won't find otherwise. Thank you Bon Apetite for the inspiration.

p.s. We didn't have the fresh herbs so we used this blend that Shellville had in her cupboard that contained ALMOST the same stuff...or was at least close enough for us to decide that another shopping trip wasn't worth it. It was really good all the same. I think we probably used 1-2 Tbsp per batch.

Roasted Cranberry Sauce with Grand Marnier and Pecan
(Makes 2-1/2 pints)

1 - 12 oz bag fresh cranberries, or frozen, thawed
1-1/4 cups sugar
3 Tbsp vegetable oil (the original recipe called for walnut, we made 1 batch without because we forgot, and 1 batch with peanut - both were really good)
1 Tbsp minced fresh rosemary
1 tsp minced fresh thyme
1 tsp minced fresh sage
1/2 fine sea salt

2 Tbsp Grand Marnier
2 Tbsp Sherry
1 orange - zested and juiced
3/4 cup pecans, chopped

Directions:
Preheat oven to 425.
Mix first 7 ingredients on heavy rimmed baking sheet and roast until the edges begin to bubble, about 15 mn.
Meanwhile, mix together Grand Marnier, Sherry and orange juice.
Remove cranberries from oven and add liquid mixture and orange zest, stirring to deglaze the pan and coat the berries.
Return to the oven and roast 10 mn more. Add pecans, toss to coat, and roast an additional 5 mn.

Fill jars and refrigerate or, if you're canning a larger batch, like we did, fill the pint jars to within 1/4" from top, process in a boiling water bath for 10 mn, take cover off pot and turn off heat and let rest 5 mn, set on towel on counter and let cool - at least 24 hours.

YUMMY!


November 19, 2010

A Refreshing Step Forward...

Just got this email from the school...and I'm happy that they're starting to change things. This is good news!!!


Healthy Food Options for Students

At YOUR SCHOOL, learning doesn’t stop when students enter the lunch line. The food services program is helping students make healthy choices that are good for kids and the environment.
With childhood obesity rates soaring, choosing healthy meal options is becoming more important than ever before. That is just one reason YS is launching a new initiative to offer healthier foods that are lower in fat, salt and sugar while serving meals kids love to eat.
The following are some ways YS is beginning to change the way they offer school lunch to students:
  • In all six of the district’s elementary schools, the a la carte options including fruit roll-ups, baked chips, flavored water and more are no longer being offered.
  • Schools, K-12, are no longer offering 2% milk. The three choices available are skim white milk, 1% white milk, and skim chocolate milk.
  • All schools are embracing the Farm to Table philosophy of supporting locally based agriculture through purchasing apples from AppleWood Orchard in Lakeville, watermelon from Prior Lake and rice blends from Indian Harvest in Bemidji.
  • A COUPLE OF YOUR ELEMENTARY SCHOOLS have implemented a Birthday Book Club to replace student birthday treats. Instead of students bringing treats to school, they now have the option of purchasing a “birthday book” for the media center with the child’s name featured in the front of the book.
  • THE HIGH SCHOOLS AND MIDDLE SCHOOLS are reducing the portion size of cookies in their a la carte selections.
WE'RE is also working to reduce its impact on the environment.
  • All schools have switched from using Styrofoam trays when dish machines are down to a totally compostable tray.
  • YOUR HS is also using eco-friendly cleaning agents in its kitchens from Minnesota-based company, Sunburst Chemicals.
  • Elementary and middle schools have contracted with a local pig farmer who picks up the food waste after lunch. Students have learned how to separate all of their lunch trash so that only food goes to the farmer.
  • Students in every school are trying to improve their recycling efforts from last year. In the 2009/10 school year, YOUR HS recycled nearly half of its trash.

November 18, 2010

Curried Butternut Squash Soup

What can I say...I pretty much loathe squash but my google reader has been filled with nothing BUT squash recipes the last couple months. Some of them would appeal to me in a certain kind of way...the photography was beautiful or the chef talking about the dish appealed to me, but I never really thought about actually cooking any of them myself. Yuck! I would post all of the recipes on my sisters facebook wall or my cousin H, since they both adore squash.  Not me. Nope. Definitely not this girl.

And then they went on sale for .48/lb at my local market and my grocery budget was UBER tight that week and I had just read an article about how they last forever, so I thought to myself - Hey! Be brave! Try something new! and so I left the market with 5 locally grown, beautiful to look at (but probably not to eat), squash.

I made the acorn squash ala my mother - with brown sugar, rosemary and butter - and they were ok. My kids and husband love them. I can eat a couple bites, but it's really not something I choose to have in the house. Sort of like tuna fish. Or plain mayo. Or...salmon loaf? Yeah...that's one I'll never make. No matter how many times my husband says his Mom made it and it was good? Nope...never going to happen.

I digress...

I also bought a butternut and a spaghetti squash. The spaghetti squash is still in my basket - we'll see where we get with that. The butternut squash? Well....I sort of fell in love with this soup. The original inspiration for the soup came from one of my favorite food blogs, Simply Recipes. I knew that I would prefer it a little spicier though - and my pot is small and I thought of a couple other things to maybe give it a little more pizazz and wow...be still my beating heart! I actually love something with squash!

Not only was it delicious, but it made a TON of soup and it was SO inexpensive and SO easy...and healthy! I've been converted. And while I probably won't post a hundred new ways to fall in love with squash, I'm going to make a point to keep re-trying things that I used to hate. Sometimes I discover something great - like this soup - or how wonderful mustard is on a hot dog, or how sauerkraut doesn't make me gag anymore...

Go make this soon...while there's still beautiful butternut squash hanging out at your market.
I promise that you won't regret it.

Butternut Squash Soup (for people who think they hate squash):

Ingredients:
1 large butternut squash, peeled, seeded, and diced into 1/2 - 3/4 inch cubes.
Olive oil
1 Tbsp butter
Sea Salt (or regular - it's just what I had on hand)
2 small yellow onions, diced small
4 cloves of garlic, smashed and minced
about 1" or 1 Tbsp fresh ginger, peeled and grated
1 Tbsp yellow curry powder
1/2 tsp mustard powder
1 tsp cumin
1/4 tsp cayenne
4 cups chicken stock
water as needed (I ended up using 2 cups)

To Garnish:
sour cream
cilantro, chopped
lime wedges (DO NOT SKIP THIS PART!!! It totally makes the dish - lightens it up, whatever...I cut a lime into 16 half-wedges and 1 was enough for a cup of soup.

Directions:
Preheat oven to 400 degrees
Toss squash with olive oil and put in shallow roasting pan. Sprinkle with sea salt and roast 15 mn, stirring/turning/tossing halfway through.

Meanwhile, melt butter in large dutch oven. Add onion and cook until translucent - about 4-5 minutes. Add the ginger and garlic, cook about 1 mn or until it releases it's fragrance - add the curry, cumin and mustard powder and stir constantly, letting it toast for just a bit - maybe 30 seconds to a minute. You'll be able to smell the change.

Add the chicken stock and make sure you scrape up any bits from the bottom of the pan - add the roasted squash and bring to a boil. Lower the heat and simmer about 20-30 mn or until the squash is tender.

Get out your immersion blender (or you can also put it in a regular blender or food processor) and puree the whole mess of it until it's smooth. At this point it's up to you to determine how thick you want your soup. I don't like soup that reminds me of baby food...or baby poo for that matter. Ishy.

I ended up using 2 cups of water and that was exactly perfect. Not too thin, not too thick.

Ladle into bowls and top with a dollop of sour cream (can also use plain yogurt), a sprinkle of cilantro and a squeeze of lime.

Serve with pita bread or whatever else your kids will try it with (mine like saltines and garlic bread!)

p.s. I feel like I must've used black pepper in here somewhere, but I can't think of where? Maybe I didn't...Hmmm....maybe I should make it again and find out!

October 30, 2010

Updates on the Non Cooking Parts of our Lives...


It's been awhile since I've posted anything other than recipes...I tend to just post the kids pictures and cute stuff on facebook but we did a little traveling recently out to Michigan to see my sister and I couldn't resist sharing some of our trip with you :) Enjoy!

My beautiful baby sister...
Monkey enjoying the great outdoors!

Bobalu taking a little break halfway up the mountain...

Moo and my nephew sharing some water...

climbing the stairs...

Pipps and my sister sharing some love...

silly boys...

entering the beach to Lake Superior...

awe inspiring...and fun!

running on the beach...

silly kids...

self portrait!

October 29, 2010

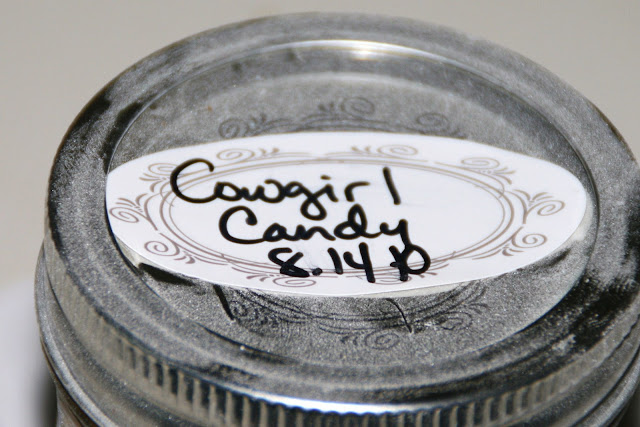
Cowgirl Candy

My new love is sweet/spicy. It used to just be salty, but now...oh man...this whole venture into canning has been so much fun and I've loved the things that I've made. The strawberry jalapeno jam, the raspberry habanero sauce, these lovely little gems that I nicknamed cowgirl candy...they all taste great on a cracker with cream cheese, by themselves, even on a grown up PB&J...mmmmm

The original recipe for the candied jalapenos was from one of the food blogs that I follow, Foodie With Family. (here's the link) I originally posted the link to this recipe on my facebook page long before I even made them - it was spring and there weren't any peppers at the market yet...I had a gazillion comments from people that wanted a jar and so when August finally rolled around, I bought out all the peppers from my favorite hippy farmer, much to his amazement (and happiness!)

They were a cinch to make, which was really the loveliest part. Canning is so simple that I can't believe I was ever afraid to try it! I love preserving the flavors of the summer and really even enjoy giving away half of what I make- although I wish I would've kept a couple more jars of these around.

My jars ended up with a bit of sediment in them, which is what really prevented me from even trying them until I was visiting my sister out of state recently...but after a couple jameson gingers (I'll post her fabulous recipe later), we cracked open the jar and OH MY GOODNESS...devoured the whole thing right there on the spot. SO GOOD.
One of them even turned up looking like a heart...awwww...


So you're probably waiting for the recipe...and so I'll just quit talking about how great these are and post it! (...and then I'm running to the store for wheat thins and cream cheese because now I just want a huge jar of these...)

COWGIRL CANDY:

Yield: About 9 half-pint jars of Candied Jalapenos plus additional jalapeno syrup.

Ingredients:
3 pounds fresh, firm, jalapeno peppers, washed2 cups cider vinegar6 cups white granulated sugar1/2 teaspoon turmeric1/2 teaspoon celery seed3 teaspoons granulated garlic1 teaspoon ground cayenne pepper


Directions:
1. Slice of the stem ends of all the peppers and then slice each pepper into 1/8-1/4 inch rounds. (You can wear gloves if you like. Personally, I really enjoy forgetting and then later, when I've forgotten that I've been handling hot peppers, rubbing my eyes and then screaming and crying like a baby while my husband just shakes his head...)
2. In a large pot, bring cider vinegar, white sugar, turmeric, celery seed, granulated garlic and cayenne pepper to a boil.  Reduce heat and simmer for 5 minutes.  Add the pepper slices and simmer for exactly 4 minutes.  Use a slotted spoon to transfer the peppers, loading into clean, sterile canning jars to within 1/4 inch of the upper rim of the jar. (Side note, (again), if you're new to canning, like I was this summer, I think there's something to be said along the lines that you can really fit a ton more stuff into jars then you'd think. Pack it in there! It's totally fine!)
3. Turn heat up under the pot with the syrup and bring to a full rolling boil.  Boil hard for 6 minutes. (or maybe longer, like 8 minutes, because I'm sure a kid is screaming about something and you'll get distracted...it's all good)
4. Use a ladle and funnel to pour the boiling syrup into the jars over the jalapeno slices to within 1/4-inch of the rim.  Insert a cooking chopstick or air bubble tool thingy to the bottom of the jar two or three times to release any trapped pockets of air.  Adjust the level of the syrup if necessary.  Wipe the rims of the jars with a clean, damp paper towel and fix on new, two-piece lids to finger-tip tightness.
5. Place jars in a canner, cover with water by 2-inches.  Bring the water to a full rolling boil.  When it reaches a full rolling boil, set the timer for 10 minutes for half-pints or 15 minutes for pints.  When timer goes off, use canning tongs to transfer the jars to a cooling rack.  Leave them to cool, undisturbed, for 24 hours.  When fully cooled, wipe them with a clean, damp washcloth then label.


September 15, 2010

Fig and Blue Cheese Bundles...

I always preface a post after a long absence by telling you how busy life has been, how crazy my kids are, or maybe how crazy they've been making me.

This will never change.

If you're new, I'll tell you that I have 4 kids. If you know me, you'll agree with my father when he says that watching all of them is akin to herding cats. 3 boys, 1 teenage girl...enough to make a person crazy, indeed!

I have a bunch of recipes that I've made or taken pictures of tucked away in my camera and desk drawer. My full intention is to start posting something at least once a week. No promises this time. I know you're tired of them...I never seem to be able to be regular with them. 5 posts in a week and then nothing for months.

What can I say, that's how this Mama rolls.

I hosted Bunco at my house in July. It was the day before my birthday and I had decided to go with a tapas theme. I went a little overboard, to say the least. I think I was in the kitchen for maybe 10 hours by the time the party started. The food was good, but 10 hours worth of cooking?!?!?! Like my husband said...is this really worth all the trouble? Well, if you make these fig bundles, I'm sure you'll say YES - YES IT IS.

My mother brought me a package of dried mission figs from Texas when she was here last and I was like...Ohhhh....Figs.

I didn't know if I'd like them or not. I do. I really really do. I also really really hope she starts mailing them to me on a regular basis along with those sun dried tomatoes (hint hint!).

Sorry to those of you that requested this recipe back in July. I've been busy/crazy/lazy and August was NOT a good month. Nor, apparently, was July :)

Without further ado, here they are: (granted, not the best picture, but I promise that they were divine...)


The Stuff That Goes In 'Em!
4 Oz Maytag Blue Cheese (or other high quality blue cheese)
24 dried black mission figs
8 - 6 x 4 slices of thin prosciutto, cut lengthwise in thirds

1/2 package frozen phyllo pastry, thawed
3/4 cut butter, melted

2 cups red wine or port (I didn't have port, nor the inclination to run to the store that day, but by all means...)
1/4 cup balsamic vinegar
2 Tbsp Honey

Prep: (The instructions, not that annoying kid in HS)
1. Cut each of the dried figs in half lengthwise and place in small bowl
2. Bring 2 cups wine to a boil in small saucepan. Remove from heat and pour over halved figs. Let sit 15-20 mn or until you're done with the other stuff and ready to "roll". Drain the wine back into the small saucepan for using later for the sauce/glaze.

3. Spray 2 mini muffin tins with olive oil or other good cooking spray


4. Place 1 phyllo sheet on work surface, (keeping remaining phyllo covered with plastic wrap and a damp towel so it doesn't dry out), and brush with melted butter. Top with second phyllo sheet, brush with phyllo, top with 3rd sheet, brush with butter, top with 4th sheet. (You will make 4 sets of these but only do 1 at a time to prevent the dough from drying out)

5. Cut sheet into 1" wide strips, down the short way (I believe they're 8 x 12 sheets, so your strips should be 1" x 8")

6. On each strip, lay a piece of prosciutto, half a fig and a tsp of blue cheese and roll up. Place in mini muffin tin and repeat until all the strips have been used. once the sheet is done, repeat step 3 and 4 with the remaining 4 sheets of phyllo dough until all gone.

7. Bake in 375 degree oven about 15 mn or until golden.

8. While baking, make the glaze: in the small saucepan, add the honey and balsamic to the wine and cook down until it resembles a thick syrup. When the bundles have come out of the tins, drizzle with some of the sauce and serve the rest in a small bowl if people want more. Can be served warm or at room temp.

FYI - You can make these vegetarian as well if you just leave out the prosciutto. I did that with quite a few for friends that don't eat meat and they were equally as delicious :)

ENJOY!